Tyson and Quinn's Corner

Welcome

This is our life with our little man, born May 2009 and our sweet daughter, born May 2011.
Showing posts with label DECORATING. Show all posts

13 December 2011

Photo Gallery Wall

I've adored photo gallery walls for years.  The Pottery Barn catalog always has the most amazing gallery walls and I knew someday I wanted one for my house.

The problem is that because of the floorplan of our house, I couldn't envision a good spot for one.  After reorganizing a bit (and taking down the print that used to hang there), I decided this little space in our foyer would be perfect.  Yes, the thermostat is in among the frames too!

Enter the gallery wall! 


Since it is a corner on the far edge of our foyer, it's a wee bit dark and hard to get a bright picture of it.


I found the vast majority of the frames at Goodwill and a few at Ikea.  I refused to pay more than $3 for any frame and I spray painted them all off white (the trim in our house is antique white).

I hung most of the frames with 3M Command Velcro Hanging Strips.  I love those things!  They are super easy to use, they hold the frames tightly, no holes in the walls, and the frames don't wobble on the wall.

I love that I now have a place to display all of our beautiful photos and as my babies grow and change, it will be easy to swap out the photos for new ones.

27 July 2011

Miss Quinn's Nursery - the furniture

While Ryan worked on the ceiling, I wasn't just supervising.  I had projects of my own that I was working on.

These dressers were given to us by Ryan's parents.  They used to be in the guest room of Ryan's grandparents' home.  When his grandparents moved into a nursing home, their home was rented out so all of the furniture needed to be moved out of the house.  We had two empty guest rooms at the time (years before we had babies or even considered having babies!) so the furniture came to stay with us.  His grandparents have now passed away so we asked for Ryan's dad's blessing to paint them for our little girl's room.

The tall dresser has a total of 5 drawers.  Sneaky.  It looks like way more than that!


Both dressers have these fun details at the bottom:


And cool fully functioning casters as the feet.  Makes them super easy to move around to clean underneath or to rearrange the room.


The short dresser also has brackets that hold a HEAVY mirror.  The glass is a little mottled in the corners, very cool.  Hopefully Quinn will get to use it one day.  In the meantime, this short dresser is perfect for a changing table with just a pad on top.  I already started removing the hardware on this one.  Oops.


 This dresser actually has 6 drawers.


I also had this vanity that I wanted to incorporate into the room.  I bought it on Craigslist at least 3 years ago.  It was only $20 and it sat in my garage for all of those years.  Needless to say, Ryan was not happy it sat there for that long!  In my defense, I wasn't quite sure what I wanted to do with it.

The finish was in bad shape, so I just had to go with it.  Peeling veneer, cracks in the wood, but structurally, it's sound.  It also has cool details like the keyhole and the casters.


So after a lot of wood filling, sanding, priming, painting and polyurethaning the dressers now look like this:


I found the new pulls on Ebay for $2 each.


And the vanity, with new glassy-looking knobs from Hobby Lobby, looks like this: 


I bought the crib at Wal-Mart for $75.  It was originally $89.99 but since it had a teensy scratch that was visible through the box, they gave me 20% off.  Score!


The chair and ottoman were repurposed from Tyson's nursery, which by the way I just realized I never posted his finished room.  I'll get on that.


So there you have it.  All of the furniture for our baby girl's room.  Stay tuned for more room details!

26 July 2011

Miss Quinn's Nursery - The Ceiling

The ceiling in Quinn's nursery, like all of the ceilings in our house, are this heavily textured business.   Ugh.  I really dislike them, but not enough to spend the time or money to deal with the hassle (and mess!) of scraping them all down, repairing the ceilings and then painting.   Maybe someday.


When we did our first crown molding installation (in Tyson's nursery), we quickly figured out how to scrape the ceilings so the crown would sit flush or close enough to flush to the ceilings. Since I knew I wanted beadboard on the ceiling in this nursery, scraping down the texture in the entire room was inevitable. Gah. So.much.work.  And so messy.  We couldn't work on it as often as we would have liked, so the scraping process took us a few weeks of working on it intermittently.  I don't have any pictures because I didn't want to ruin my camera with all of the dust and mess!

After the scraping was done, the next step was the beadboard. We were all set to use the big sheets of beadboard that you can buy at Lowes and HD. We had even calculated out how many sheets we needed to buy, but hadn't pulled the trigger yet.

One weekend while browsing the Sunday newspaper ads, I found packages beadboard panels on sale at Menards. After doing the quick math, we found out that these packs would be cheaper than the big panels and Ryan thought they would be much easier to work with. So we went with these instead and I must say, it worked out wonderfully!

We didn't have much to work around with the ceiling and the room was easy, since it's really just a large rectangle. We, er, Ryan, only had to cut around the vent, the light fixture and the hardwired smoke detector.

Here goes...the first panels are up!


Ryan works so hard!


You can see the size of each beadboard panel in this photo:


Once all of the panels were up, Ryan went through the tedious process of filling all of the nail holes, caulking the joints between the panels and painting the ceiling.  We painted it the same semi-gloss antique white color of the rest of the trim in our house.

The final step of the ceiling project was to hang the chandelier.  It cost us nothing since it was originally hanging in the dining room of our house when we bought it.  It was bright and shiny brass and I spray painted it white. 

I wasn't even sure if the light would still work.  It had sat in our basement for 4 years and survived a flood.  I had to give it a good scrubbing before I could even attempt to paint it.  That thing was a gross, dusty, cobweb-y mess. 


After installing the fixture, I painted the walls.  That was my big contribution to the room.  :)
I painted the entire room in the evenings one week while Ryan was out of town.  

The ceiling is complete, walls painted and the chandelier hung.  The only thing left to do is to install the crown molding.


The ceiling was by far the biggest project of the room, but I LOVE how it turned out! 


There are LOTS more details to come, stay tuned!

25 July 2011

Miss Quinn's Nursery

I think I'll probably do this in several posts--and I can't believe I haven't already done it yet--but here goes!

Quinn's nursery started out with this nursery that I saw online before I even knew if we were having a boy or a girl.  I loved the color scheme, the freshness of it and just how simply beautiful everything looked.  So, I stashed it away (aka, saved it to my favorites) and hoped for a girl.  :)  I also had plenty of ideas lined up for a baby boy, too.


I also knew that regardless of the sex of our baby, we were doing a beadboard ceiling in the room.  Ryan thought I was crazy, as he usually does with most things I suggest, but after browsing a few online photos he was on board.

Our nursery started out looking like this:


And now looks like this:


I'll be back with the details of the room!

17 May 2011

DIY Crib Skirt

After I decided that the main color of our daughter's nursery would be lavender, I started on my hunt for the perfect bedding. I fell absolutely in love with the lavender Harper bedding from Pottery Barn Kids.

But, I bought PBK bedding for Tyson's room and while it is beautiful and I still love it, as a second-time mom I know crib bedding actually gets very little use. Tyson's beautiful crib skirt had to be removed as soon as we lowered his crib for the first time. It was a big expense for something that we only ended up using for a few months.

When I read the crib skirt tutorial on Young House Love, I knew I could make a knock-off Harper bedskirt myself. I already had the white fabric. It was from grommet curtains that rusted the first time I washed them. FAIL. At least the rust allowed me to salvage some of the fabric.

I went to Hobby Lobby and bought 2 kinds of ribbon and 2 rolls of Heat & Bond tape. After about 2 hours of measuring, cutting and ironing, I had my crib skirt. Not bad for about $9! Now I won't mind as much when I have to remove it to lower her crib. But, I can always change the length of the fabric too! Total win.


23 January 2011

the Crown Molding Project

A few weeks before Thanksgiving, I finally convinced Ryan to put up crown molding in our foyer and dining room.

Dining room, before:

Foyer before:

More foyer, before:


Last before shot of the foyer:


The work begins! He taped off where the bottom piece of molding would go. We did a 3 section molding, with the crown in between. It gave us more of a stacked or thicker crown look.


My job was to paint the trim and crown pieces.


Installation has begun! You can see the top piece of molding (attached to the ceiling) and the bottom piece. The crown goes in between these two.


The finished product!


We have a small section of our foyer that is two stories with about 8" where there was a gap. Ryan just took the crown all the way across so we have two pieces that stick out a bit. It was a perfect solution to these weird sections.


Ryan did such a great job! It took a lot of convincing and it took several weekends of hard work. This was only his second crown molding project, but I think it looks completely professional. I appreciate his need to be a perfectionist and it turned out beautifully!


Valentine's Day Mantel

As I browsed through several of my decor and craft blogs over the past few weeks, I was inspired to do a Valentine's Day mantel.

I have always decorated a bit for Valentine's Day so I had some things on hand, but I did add a few new things this year.

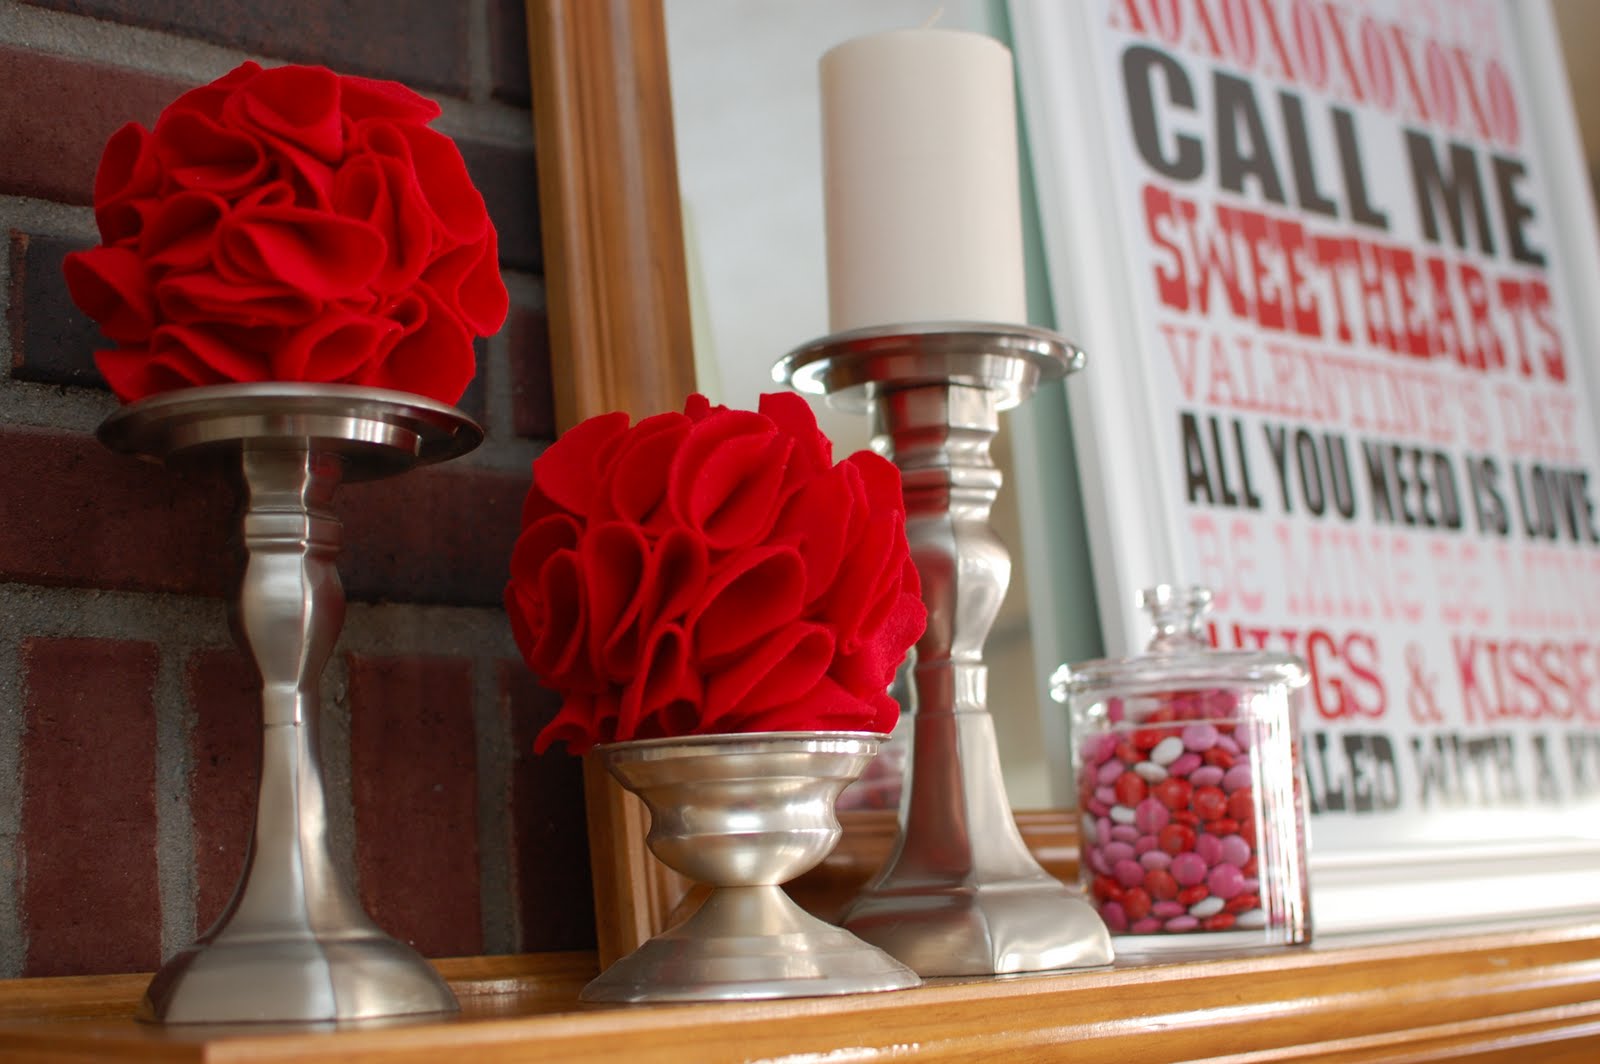
First up, I spent yesterday making some felt flower balls. I found the tutorial at one of my new favorite blogs, Eighteen 25. I was going to attempt to make her heart shaped wreath, but after cutting so many 3" felt circles, I thought three flower balls was enough. Maybe next year!

I love the way they turned out! Not bad for $5 in styrofoam balls and $3 worth of red felt. It's a really easy craft if you have the patience to cut loads of felt.

I already had the silver pillar holders and the white pillar candles. I also put some Valentine's M&Ms in a glass apothecary jar that I received as a Christmas gift.

I also found this Valentine's Day subway art from Eighteen 25. A free printable poster...can't beat free! I had it printed at Walgreens in the 16x20 poster size. I did buy the frame at Michael's, but I can always reuse it for something else.


The heart garland was $4 at Michael's and I already had the LOVE sign. I'm pretty sure I bought it at the Target Dollar Spot last year.

I'm linking up to The Stories of A to Z Valentine's Mantel Linky party.

10 January 2011

New Desk Chair

The before, a $9 chair I found at Goodwill, sitting in our messy garage (don't judge - we were in the midst of a big project at our house).

I had been searching for a ladderback chair for a while and even bought one on Craigslist. Unfortunately, that chair was super uncomfortable. But this chair was the total opposite! It was in great condition, no wobbly legs, cushy seat and uber comfortable, or as comfortable as a ladderback chair can be.


It just needed a touch up for our office. After a few coats of black matte spray paint and $6 invested in jazzy new green zebra fabric, it's perfect. :)


I'm so happy with how it turned out :)

LinkWithin

Related Posts with Thumbnails